ALLEN & HEATH - XONE:23C

SETUP
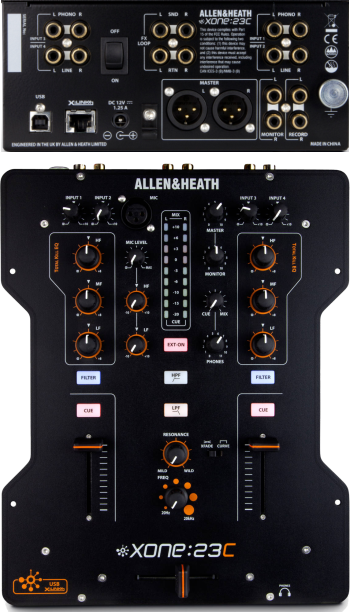
STEP 1 : CONNECTIONS
- Connect amplifier or amplified speakers to the rear-panel Outputs of the device.
- Connect your Headphones to the front panel socket using a 1/4" cable or adapter.
- Connect the Allen & Heath Xone:23C to a USB port of your computer via the rear-panel USB socket, using a USB cable.
- Optionally connect your DVS (Timecode Vinyl or CD) to the rear panel Inputs PHONO or LINE. See Advanced Setup - DVS
- When the above connections are done, connect the Allen & Heath Xone:23C to AC and power on.
Additionally , you can connect a Xone K2 to the Xone:23C via the XLINK socket using the provided cable. See Advanced Setup.
STEP 2 : DRIVERS
Both Windows and Mac OS : Download and install the Xone 23C driver and Device software (firmware) from https://www.allen-heath.com/ahproducts/xone-23c/ .
STEP 3 : VirtualDJ 8 Setup
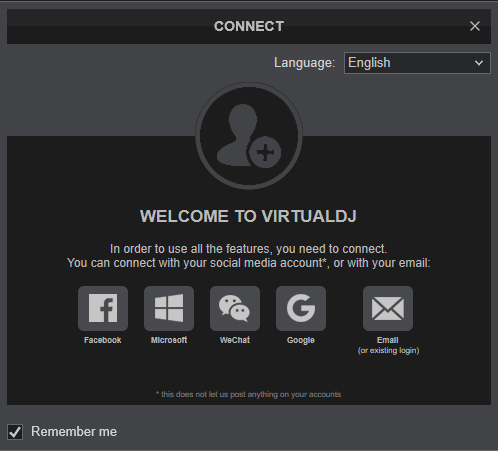
Once VirtualDJ is launched, a Connect window will appear to enter your virtualdj.com account credentials.
A Pro Infinity or a Pro Subscription License is required to fully use the Xone 23C. Without any of the above Licenses, the device will operate for 10 minutes each time you restart VirtualDJ.
https://www.virtualdj.com/buy/index.html
Click on the "XONE 23C" if your speakers are connected to the Main Output at the rear side of the device.
You can still make changes in the Audio setup from VirtualDJ Settings->AUDIO tab.
Press OK.
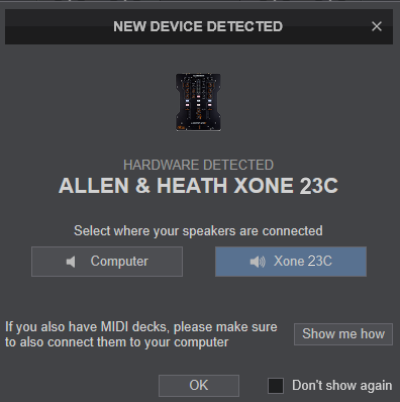
The unit is now ready to operate.
CONTROLS
The Allen & Heath Xone 23C is a hardware, stand-alone mixer applying its own audio mixing, Equalizer and FXs with no MIDI functionality.
For all the hardware and mixing features of the device, please refer to Allen & Heath Xone 23C Manual. https://www.allen-heath.com/ahproducts/xone-23c/
ADVANCED SETUP
AUDIO SETUP
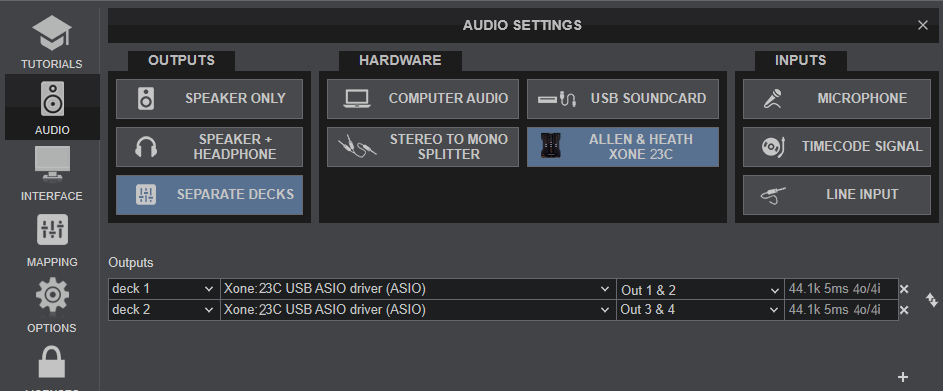
The following image displays the default Audio setup for the Xone 23C, which requires speakers to be connected at the rear panel.
TIMECODE (DVS)
The default routing for the soundcard sends (to the computer) is for USB channel 1-2 = record output and USB 3-4 = FX send. This configuration allows you to record your set and add FX.
In order for the inputs to be used for Timecode (DVS) ...
- The mixer soundcard routing will need to be internally reconfigured. Please consult the A&H Xone:23C Guide (page 19) for further details. https://www.allen-heath.com/ahproducts/xone-23c/
- Connect your Turntable with Timecode Vinyl to any of the 2 rear-panel Inputs and set their USB switcher to PH
- Connect your CD Player with Timecode CD to any of the 2 rear-panel Inputs and set their USB switcher to LN
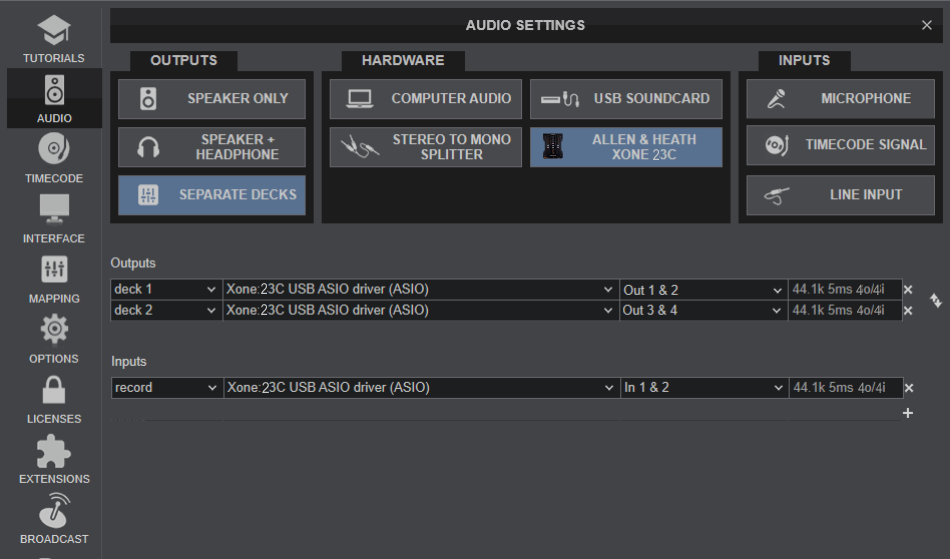
- In VirtualDJ Settings->AUDIO tab, press the TIMECODE SIGNAL button for Timecode Inputs to be added as per the following image.

For further setup information about Timecode in VirtualDJ, please refer to VirtualDJ Manual
RECORD & BROADCAST
The default routing for the soundcard sends (to the computer) is for USB channel 1-2 = record output and USB 3-4 = FX send. This configuration allows you to record your set.
You will need to ..
Manually add a record line to VirtualDJ Audio Setup, using the USB Channel 1,2 of the Xone 23C sound card, as per the following image.
If recording is not working as expected, perhaps the Audio routing of your mixer is set for DVS and needs to be internally reconfigured. Please consult the A&H Xone:23C Guide (page 19) for further details. https://www.allen-heath.com/ahproducts/xone-23c/
Note, that Video mixing is still possible, despite the fact that the Crossfader and Volume faders of the Xone 23C are not sending MIDI. See our Mixing Guide - Wiki page
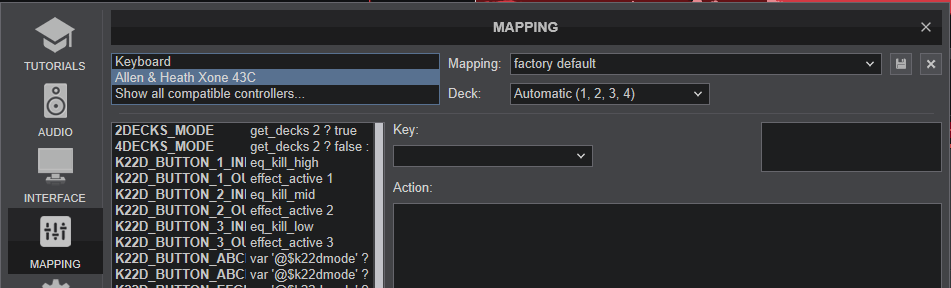
MIDI SETUP
The Xone 23C should be visible in the MAPPING tab of VirtualDJ Settings and the “factory default” available/selected from the Mappings drop-down list.
None of the Mapping keys are part of the Xone 23C device, as the device is not sending any MIDI messages from any of its knobs, faders or buttons.
If you have connected a Xone K2 to the rear-panel XLINK socket, the MIDI functionality of the K2 will be offered through the Xone 23C (thus the Xone 23C Mapping includes all the K2_ keys). For further operations of the Xone K2 connected via XLINK, please refer to the Xone K2 Manual